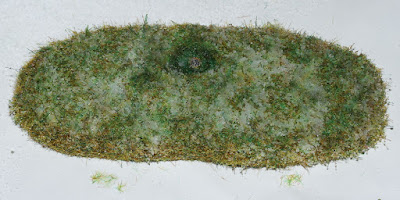
After parts One and Two of this series, our base is looking pretty good. It's covered in a nice lush layer of static grass, and if you wanted, you could just finish the bottom and leave it as is. But I wanted to add a nice dusting of snow to this piece, so I'll be covering that as well.
The tools and materials you'll need for this part of the tutorial are:
- Prepped base
- Diorama snow (I'm using Scene-A-Rama snow I got from Hobby Lobby)
- Spray sealer
- Something to cover the bottom of the base (I'm using leather)
- Scissors
- Sandpaper
- Sand
- Static grass
- Water-based white glue
- An old/cheap paint brush you don't mind getting glue on
- Static grass applicator
- Scrap paper or some other material to cover your work surface
If you want to do a base completely covered in snow, you can skip the static grass and just do snow, but the look I was going for here was a thin layer of windblown, wet, large flake snow like you might see in early spring after the grass has started growing again.
To achieve this, I started by holding the base at a steep angle and sprinkling light layer of snow over the base. I did this while the base was dry so I could shake of the snow and start over if I didn't like how it looked.
After sprinkling with snow it should look something like this. The snow will catch on upward facing ridges and clumps of grass while the downward facing sides remain relatively bare, simulating the look of snow that has fallen while the wind was blowing.
Once you're happy with the snow, spray the base with sealer to hold it in place. Don't be alarmed if the snow looks slushy after being sprayed.
The snow will turn white again as it dries. Feel free to add more layers of snow if desired. For a little extra bling, you can even add a touch of fine glitter to simulate the sun sparkling on the ice.
After working so hard on the top part of the base, you'll probable want to do something nice to finish of the bottom. There are a lot of materials that can work for this. Felt is a good choice. It comes in a lot of different colors, and sticky-backed felt in particular is very easy to apply.
For this base, however, I'll be using leather. Usually I'd go with a more neutral color, but this base is for a unicorn and I happened to have a small piece of this blue leather that matched him perfectly. I set the base on the leather and carefully traced it with a marker.
Next, after cutting out the leather with a sturdy pair of scissors and checking the fit, I used some coarse sandpaper to rough up the top of the leather and the bottom of the base so the glue would bond better.
After gluing on the leather and letting the base dry, it looked like this. The exposed edge of the leather needs to be covered.
I glued some sand around the bottom edge, being very careful not to get any glue on the bottom of the leather.
I then added a little more static grass and snow to blend everything together. After a final coat of sealer the base is finally finished!
This is what the finished bottom looks like:
And here is an extreme close-up shot of some of the snow-covered grass:
Thank you very much for reading! I hoped you liked this series, and maybe can apply some of these techniques to your own bases.


No comments:
Post a Comment