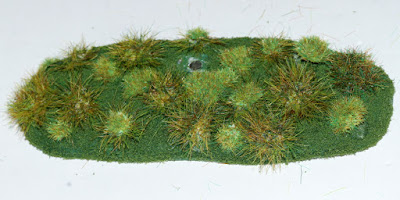
If you haven't already, I recommend reading Part One of this series, where I showed you how to prep a base for static grass application. In part two, I'll show you how to go about adding the static grass.
The tools and materials you will need for this part of the tutorial are:
- Prepped base
- Static grass
- Static grass tufts
- Water-based white glue
- An old/cheap paint brush you don't mind getting glue on
- Static grass applicator
- Scrap paper or some other material to cover your work surface
First, I'll be adding some grass tufts to the base. While this step is optional, it adds nice depth and texture. It's possible to buy pre-made static grass tufts, but I like to make my own. I may do a post about it in the future, but basically you just apply static grass to drops of glue on wax paper.
I like to use a mix of sizes and colors, and just stick them on the base with a drop of glue. You can use them alone, stack them, or place them in clusters.
Once the base has been covered with tufts, it'll look something like this. It's all right that things look a bit patchy at this point. Just make sure the base is completely dry before moving on to the next step.
Now it's time to set up the static grass applicator. I like to do this before applying glue to the base. I make sure there's plenty of grass in the applicator and attach the applicator clip to the base (the magnet on this base makes things really easy.) The static grass applicator I'm using here is the GrassTech I.
Now I apply glue to the base. I'm using Aleene's Tacky Glue with just a little bit of water mixed in. It's important to apply the glue quickly, or else it will start to dry before the grass is added.
Once the glue has been added, I sprinkle on the grass while holding down the button on the applicator. It's very important to follow the instructions that come with the applicator to avoid getting a nasty shock. The static grass I used here is PECO 2mm Spring Green.
Once the glue is dry (I like to let it sit overnight) brush off the loose grass. There will probably be some uneven or bare patches, but that's all right. On this base, you'll notice that the edges in particular haven't been covered by the first coat of grass.
Just repeat the previous steps, adding glue and covering it with grass, until things look the way you want. I like to use multiple colors and sizes of static grass to give the piece more interest and texture. You can also incorporate other materials such as sand, dirt, or artificial water. You can add more grass tufts or flowers. And if things don't work out, just soak the base in hot water for a bit. This will soften the glue so you can scrub everything off and start over.
I'll end part two here. In part three, I'll be showing you how I added snow to this base, as well as how to go about finishing the bottom.


No comments:
Post a Comment